Between 1957 and 1970 Cheoy Lee produced approximatley 133 folkboats originaly sold as the the Offshore 25, better known as the Frisco Flyer.

There were three versions of this small blue-water boat.
91 in all wood and 42 in Fiberglass with wood. There were 55 Type I's and II's and 78 of the Type III's. The Type I (aka the Pacific Clipper) was an all wood boat, had a mast that was stepped through the deck, a traditional folkboat fractional rig and a smaller cabin. The Type II's had a larger teak trunk cabin and a masthead rig. The Type III's had a larger teak dog-house cabin, some "standing" headroom and a masthead rig stepped on deck. The earlier Type III's were solid teak built onto a fiberglass hull and the later Type III’s (1966-1970) were made entirely out of fiberglass with teak paneling.

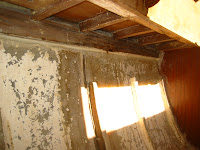
This boat, Yard # 1507 is one of approximatley only 30 Type III's left. It was out of the water for the previous 16 years when I got it and then about another 5 more while I rebuilt it. It was an empty, cracked hull when given to me and needed a complete restoration/refit.
It took about five years of long nights and weekends of working outside under a tarp, in the garage or in the boat during cold winter nights, wet rainy afternoons and everything in between. The occasionally eager assistant on the project was my four (now ten) year old daughter who can have this boat as soon as I convince her mother to get another one. This blog is the record of all the work that "we" have done to the boat as well as some other somewhat related events with friends and family. Eventually, this will be put together in a book which will stay with the boat.


She still has plenty more to go but for now, Jackaroe has been in the water for a couple years now and thats all that matters...

To see past projects, use the links below.


Questions and comments to Matthewearlgarthwait@gmail.com


Wednesday, June 27, 2007

Cicada's in...

Spent yesterday afternoon down at Rye harbor with Cicada as she gets ready to get wet,


She looks great compared to just two weeks a go. All together, refastened, varnished and ready to go.


Mimi came down to say hi to the mistress...


Had a couple of cold beverages to celebrate.


Even the kid even came down to inspect things. Nice Pussers hat!


Cicada was launched and unlike most of the wooden boats in town she went in without an issue. I guess 10 out of 12 wooden boats launched so far had to be pulled back out because they were taking on too much water. Some boats had to go in and out more than once. Cicada took on little water and after a short motor, she's swelling up in downtown Portsmouth.


As for Jack-a-roe, I spend some time last night spreading some epoxy and glassing in the floors stringers and bulkheads. I had the Treo Phone playing a Cornell 77 show to work by. Not a bad way to work on a hot summer night.

I decided to just put the chainplates on knees and 4 out of 6 of them will be attached to the bulkheads so they'll be plenty STRONG.
While I was out there last night, I had a chance to inspect every inch of the sheerclamp/hull to body joint really well and with the exception of the already known problem area, the boat is in good shape. I'll be adding some epoxy in places but for the most part, it looks really sound.

Next step is to put the knees in...or maybe the ballast??...
What I should do is clean the boat out, its a mess..

Sunday, June 24, 2007

Gaps in cabin house boards...filled!

The last couple of days have been great on the boat. I finally tackled the gaps in the cabin house boards.
Before...

I cant wait to see the whole topside painted and varnished, the stanchions and hardware back on etc. so the boat at least starts too take on a finished look on the outside.
But before I can do any of that, I have to replace the old and missing splines. The splines that were there had dried out and fallen out. Most of them anyways, the rest I encouraged out. Whether or not these were added during the refit in Noank in 77/78 or if they were original in 65, either way they've been for most of this boats life and they never seemed to cause a problem, never cracked a port light or anything else so the plan is to replace them rather than remove the cabin house and rebuild the sides. No thanks, i do want to go sailing before my kid leaves for college.
With the splines out, the gaps left behind were all different sizes and some tapered all the way from 1/4 inch down to long hairline cracks. I had planned on just routing out all the gaps to some uniform size and then cutting up a bunch of splines to match for convenience. I ended up though just cutting about a million little different sized teak splines of different sizes and tapers, dry fitting them like puzzle pieces and adjusting each one to fit with a small plane and sanding. Each one had a custom fit. I then layed them in with some one part epoxy and the next day took the bulk of the excess off with a small plane and sanded it flush.

They look perfect except the splines are a shade brighter them the walls. It should all even out once I wipe it down with some tinted grain filler then undercoat with West System and finally with varnish.
After...only partially sanded, but looks good....


BUT... before I can finish the cabin walls with West and varnish, I need to replace and make new teak trim that goes around the bottom of the interior walls and around the bulkheads.
BUT before that I need to finish the bulkheads themselves which means tabbing them in and painting to match the way they were in 65.
BUT, before that I need to decide what to do with the chainplates. If they're going to be on kness glassed to the bulkheads then I have to do that first.

I haven't done any glassing on the boat at all yet and there are so many small things which need to be done/repaired with fiberglass and epoxy that I should just get started. All the chainplates, the stringers separating the sections of ballast need to be re glassed, the bulkheads need to be tabbed in for rigidity/strength, the bases for the berths and cabinets need to be tabbed, the (motor well needs to be cleaned, degreased and) re-glassed , I'm thinking of glassing in the sheerclamp when its repaired and of course the DECK needs to be finished.

Wednesday, June 20, 2007

Sheer clamp...

Another project to get to sooner rather than later will be to repair all the rot in the sheer clamp. My guess is that because the boat wasn't stored well for several seasons, rain and snow had access to at least a section of the deck. Thankfully the rot seems to be located only on the starboard side and only in the area around the companion way.

So far the "professionals" are telling me I can just repair this in place rather than have to remove any part of the deck. To just remove all the dead wood back to good wood and join in a new piece. This is good because I really want to finish the deck and get some real protection from the elements asap. Either way the sheerclamp has to be done before the cabinet/berth goes in on that side.


As for today, I spend a lot of time grinding the fiberglass around the floor stringers and chainplates and removing paint on the glass to prep it for tabbing the bulkheads, new chainplate knees, cabinets, berths and floor stringers. Cant wait to start glassing the inside back together.

Tuesday, June 19, 2007

Kolibri, 1966 Type III

Well, I was going to put up a post about how much work I got done today on the boat but then I saw this....

"Kolibri" a 1966 Frisco Flyer III in Chicago.


What a great looking boat and restoration job! This boat looks exactly like Jack-a-roe in just about every way. Every single thing you see on Kolibri is in my workshop, varnished and waiting to go back in Jack-a-roe. This boat is so close to mine, I'm surprised I haven't seen it before. It doesn't look like there was any difference between the 66 and 65's and I can use these pictures as a road map in putting mine back together. The only exception or difference I can see between the two so far is that at some point Kolibri had her dog house rebuilt over the years and in doing so lost the beams over head in the cabin, her chainplates were also placed on knees rather than being layed up in the hull ( a change I'll probably make too, although I'm tempted to just move them to the outside) and there is a opening light over the forward hatch.

Since getting Jack-a-roe, I've seen more Flyers than anyone should ever have to, but this is the only one I've seen one with all the original gear like mine (that was together). This is about as close as you get to a perfectly restored Flyer as there is.

In additional to two slide shows on the boat, there's even a small movie,

http://homepage.mac.com/davidcella/PhotoAlbum13.html

http://homepage.mac.com/davidcella/PhotoAlbum10.html

http://homepage.mac.com/davidcella/iMovieTheater12.html


I was able to talk to the guy who put up the website, David. He says he's the past owner, he has since sold Kolibri to another guy in Chicago but still checks on it and says its in good hands. David's now restoring another 65 Cheoy Lee. This "new" one is a Lion and is also on his website.

Sunday, June 17, 2007

Knees...

The check list of things to do on this boat is more than a mile long and can be overwhelming when trying to consider all of it at once. Even though all the projects are small ones, taken together it seems they will never get done. Deciding what to work on and when to do it changes constantly. It actually kind of suits my ADHDish style work ethic, I start something one day and if I don't continue it the next and start something else instead, it doesn't really mater because it all needs to get done at some point. As long as I'm working on something then there is bound to be some forward progress in it.

That's why it was nice though to finish the knees and get that one little thing checked off the list. Its good to see something that was once buried under paint and left to weather, now restored to new. In the belly of the boat where everything looks like downtown Baghdad, they shine and give the rest of the boat something to aspire to.


The other recent project inside has been to strip the beams in order to varnish later. They were also buried under loads of paint but they were made this way. I wanted to varnish them. This is the first thing I'm doing that's strays from the way the boat was when it rolled out of the Cheoy Le shipyard in '65. I was tempted to just throw a coat of paint over all of them and be done with it but I think the varnished wood will look great against the white field of the ceiling. (blame art school)

Rudder...

Still trying to decide what to do with this rudder. There's a really nasty twist in it, the pins are completely wasted inside, and the cracks in the grains have been filled again and again with bottom paint to the point that they have now have large 1/4 inch gaps in it.

I could just ask the local lumber guys here in town to mill up a 10 foot 3 inch, by three feet wide by three inches thick stick (looks like mahogany) and make a new one, or I could try and find a way to salvage this one as is.

Yesterday I cut off the twisted, damaged part of the rudder's blade and cutting right through the pins you can see what damage the water has done to these things over the years. The pin has corroded so much that it has pushed out on the wood causing it to twist and turn. It doesn't look like bronze. I'm going to try to knock the pins out and rebuild just the blade and join them together (with bronze).


This should work for a few seasons anyways.


First coats...

Its been a great couple of days working on the boat and I was able to get more than a few things accomplished. I applied the first coats of 50/50 and 75/25 varnish/thinner on the cockpit staving and coaming. After two/three coats its already looking like a new boat. Only 8 more coats to go!


I also put some hi-build primer on the cabin house roof, the cockpit sole and the tops of the hatches. This stuff goes on like mayonnaise and should fair out the surface pretty evenly once a few coats go on and gets sanded.

Monday, June 11, 2007

Update from the fleet..

I've been working on a bunch of little things things lately on Jack-a-roe but unfortunately haven't taken any pictures for a while.
I know that Bumps and Bruises is going in on the 28th and seems about ready.


I got together with Steve and Charlie took some pictures of Cicada and Sacajawea the other night...

Here are the proud owners in deep thought, (Steve was in better condition than he looks)

Charlie has scraped and prepped the inside of the Sac, which was oiled/painted a hundred times over the years.

If this boat is hit by a cannon and then burns and sinks to the bottom, this butt block will still be holding fast

A couple ribs were removed and new ones are being made, steamed and put back in place

Where the old ones were.


As for Cicada,
In getting ready to be launched (20 days, but whose counting) Cicada had her interior varnished and this slowly grew into the boat getting gutted...

The table was removed,

everything in the head,

The cabin sole was stripped and prepped for varnish but not before the floorboards covering the bilge were pulled out. I guess that Steve looked in there and noticed that a lot of the fasteners were wasted and needed to be replaced (on order?
.
The kid's ladder was also stripped and varnished (there's a nice varnish room set up in the barn these days) and I'm sure there's a lot more but this is it for now.

Monday, June 4, 2007

Looks like rain...

Its a good thing I'm rebuilding this boat! By the time the rain stops we may need an ark to live on. It's only been raining for a day or two but its coming down hard (and the forecast is more on and off for the next day or so). I already had to go out a shop vac twenty/thirty gallons off of the plastic tarps covering it from just last night and today. The tarps protected everything from the companionway forward but there was a nice (not so) little pool over the entire cockpit area. All this water just hung there suspended an inch over all the fresh sanded and prepped wood. There was a little dripping but only very little and it was onto the FG floor and thankfully not all the wood. Some water always seems to squirrel its way onto the deck when it rains. There is some bare wood there (where the epoxy had failed) and it just makes me think that I really need to get the decks finished soon.

I never thought the first time I would use the bilge pump on this boat would be on the hard in the yard, but I'm starting to feel like I should just put a sump up there and plug it into the house.

....Make yourself an ark of cypress (teak with spruce spars) wood (and fiberglass); make rooms in it (with a head, sink, ice chest, locker for foul weather gear and three berths). Coat it with pitch inside and out (and use plenty of epoxy and bottom paint). Go into the ark, you and your whole family (even that howling little bird dog), because I have found you righteous in this generation.
Genesis (more or less)

....brave the storm to come, for it surely looks like rain .....I cant take one more @#*! rainy day
GD (more or less)


Sunday, June 3, 2007

CL Association Clippers and Flyers

These are the Flyers and Pre-Flyers (Clippers) from the Cheoy Lee Association website. There are a lot more mentioned on their website but these are the only ones who have submitted pictures of their boats. As more people eventually send photos in to the CLA of their boats, I'll probably add them here too for my own use in restoring Jack-a-roe. It's a good resource for communicating with other CL owners and to look at the other boats out there as a reference and guide. A lot of the contact information of the owners doesn't seem to be up to date but hopefully this will chance too.

The ones close to Jack-a roe are the 64's tp 66's. Before 64 they were more of a Type II and after 65 while mabye a type III they had a glass dog house covered with Wood as opposed to an all wood dog house like Jack-a-roe....


Speaking of the CLA...James and Cilla, who started and run the CLA website (in their free time) have created a valuable resource for all of the CL owners out there and we should all be thankful to them. Its been VERY HELPFUL for me to communicate with other CL owners.

Thanks!

All of these photos are from: http://www.cheoyleeassociation.com/Owners/friscoowners.htm


Flyers...

"WitchCraft" - 1964 Frisco Flyer III...

"Dragon Lady" - 1964 Frisco Flyer II...

"SEA MONKEY" - 1965 Frisco Flyer III...

"Serenity" - 1964 Frisco Flyer...

"Kolibri" - 1966 Frisco Flyer III...

"Kilohana" - 1964 Frisco Flyer III...

"Nirvana" - 1967 Frisco Flyer ...


Clippers....

"SUMATRA" - Cheoy Lee Frisco Flyer, Type II..

"ZDENKA" - Frisco Flyer, Type II...

1959 Cheoy Lee Pacific Clipper Hull # 740 "Dulcinea" (for sale)...


"Jin Long" - 1962 Frisco Flyer ...


"Kuanyin" - 1963 Pacific Clipper...

"Magic Dragon" - 1963 Frisco Flyer II